Have you gone to your local HVAC supply house to buy a plenum with a Pittsburgh seam that was not assembled? If you are an HVAC professional or do-it-yourselfer, more than likely you have. The purpose of this short tutorial is to show how to assemble a Pittsburgh seam in a few simple steps, with a couple simple tools.
The Tools of the Trade
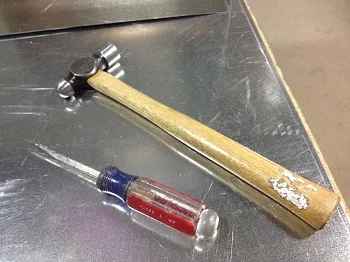
There are two hand tools you will need to get the job done and there's a pretty good chance you have them both in your tool bag, basement or kitchen junk drawer, a hammer and a screwdriver. The picture shows an 8oz. ball pein hammer, which is a good size and weight for getting a nice, flat seam. However, any normal hammer will work just fine as long as it's not heavy duty, like a sledge hammer. The screwdriver is a standard flat head which will be used to spread the seam of the Pittsburgh joint, making it easier to assemble the plenum.
The Look of a Pittsburgh Seam
So what is a Pittsburgh seam anyway? Basically, the seam shown below on the left is a Pittsburgh seam and gets it's name from the machine that forms it. A Pittsburgh machine is very common in the sheet metal fabrication trade and something we use on a daily basis. The seam is created by feeding flat stock through a set of rollers forming the seam as the sheet metal rolls through.
All this talk about Pittsburgh seams and I'm forgetting the other player in this assembly scenario. A sheet metal plenum with a Pittsburgh joint needs a quarter inch bend on the opposite side that will sit inside the Pittsburgh joint. The photo on the right shows the quarter inch bend that will be inserted into the Pittsburgh joint on the left.
The Steps
Step 1
The first thing you want to do, like mentioned above, is spread the Pittsburgh joint so the 1/4" bend will fit easily. Next, place the 1/4" seam inside the Pittsburgh seam, starting at one corner or joint of the plenum, shown in the photo below on the left.
Below, on the right, you can see what the joint should look like after placing the 1/4” seam inside the Pittsburgh seam.
Step 2
Next you want to pein or hammer over the 1/4” that is extending up above the flat plane of the plenum side. The first thing I do is pein over the top, middle and bottom (shown in the photo underneath on the right) corner to pin the side in place, helping to keep the side from sliding.
One trick to help the process:
After you have one side to this stage, take the other Pittsburgh side and start the opposite corner. This will help to prop up the first side you started, making the hammering process much easier to finish.
Step 3
Now you want to hammer down the entire side flat to finish the joint.
When these two joints are complete, flip the piece over and repeat the same steps to finish the un-capped portion of the plenum.


